

JavaScript has become the go-to programming language within the software development industry. Front-end developers aim to build rich and feature-rich UI using JavaScript development and interact with back-end web services via AJAX. Because JavaScript is non-blocking, a web developer who works in the server-side area has switched their focus to JavaScript.
Today, anyone-end frameworks such as TezJS, VueJS, React, Angular, etc., utilize JavaScript as the main language due to its code optimization. In reality, selecting JavaScript development tools as your first choice will provide many opportunities to master one language while creating “full-stack” web applications. The key ingredient for the servers-side JavaScript advancement is NodeJS.
Let’s now understand the meaning behind NodeJS.
NodeJS is an open-source, cross-platform application that executes and runs JavaScript programs outside the browser. It’s a variant of Chrome’s Version 8 JavaScript runtime engine that allows developers to create web-based JavaScript applications. It includes everything needed to run programs created in JavaScript. Furthermore, companies choose NodeJS over other back-end technology because its massive NPM packages make NodeJS development services faster, more flexible, scalable, and more cost-effective. The top global brands in the Fortune 500 list have leveraged NodeJS to develop enterprise-level applications and benefited from top speed and scalability.
What is NodeJS and NPM?
NodeJS is an open-source server-side JavaScript runtime environment that permits running JavaScript code without the web browser. It was initially designed to create scalable networks; NodeJS has evolved to become a platform that can be used to develop various kinds of software, ranging from Web servers to Command-Line tools. One of the most important attributes is the event-driven, non-blocking I/O model that increases the effectiveness of the application by handling many concurrent connections.
In JavaScript development, NodeJS plays a pivotal function by allowing developers to utilize JavaScript to script server-side. Fusing front-end and back-end languages speeds up the development process, creating smoother transitions between server and client code. This means that developers can build powerful, high-performance apps using the same language used across the entire stack.
NPM (Node Package Manager) enhances NodeJS by providing a complete package manager to manage JavaScript software and libraries. It makes it easier to share, find, and install code packages, improving the development workflow’s effectiveness. NPM lets developers benefit from an extensive set of pre-built libraries and modules that save time and energy to create code from beginning from scratch. Its value lies in the ability to foster collaboration, code reuse, and a more systematic method of managing dependencies in projects, which contributes to the overall efficiency and effectiveness of NodeJS applications.
System Requirements
Before you begin the installation procedure of double click NodeJS and NPM, it is essential to ensure that your system meets minimal hardware and software requirements. NodeJS and NPM are various instruments, but their maximum performance depends on the infrastructure.
Hardware-wise, the requirements are usually minimal. A laptop or computer that has enough processing and memory should suffice. NodeJS is intended to be lightweight, allowing it to be compatible with various platforms. However, using a system with at least 1GB of RAM and a fast processor is recommended for a smoother experience.
On the software side, NodeJS and NPM are compatible with various operating systems, including Windows, macOS, and Linux. It is essential to review the computer’s requirements to confirm compatibility and spot any potential problems. Understanding your system’s specifications ensures an easy installation scripts process and lowers the possibility of compatibility issues later. In addition, keeping your operating system current with the most recent patch and update is a good idea to take advantage of the most recent features and security enhancements offered with NodeJS and NPM.
Installing NodeJS on Windows
Installing NodeJS on the Windows system can open doors to a vast world of flexible JavaScript development. NodeJS is a server-side runtime based on the V8 JavaScript engine that enables developers to expand their programming skills beyond the limitations of web browsers. Installing it on Windows, the most widely used OS, can be an essential option for anyone looking to take advantage of the capabilities of NodeJS and its associated NPM, the package management system.
Examining the complexities of this installation will allow users to seamlessly integrate scripting on servers into their projects, ultimately improving the performance and scalability of their apps. This guide will help you understand the installation process, making it easy for developers to get into the world of NodeJS development on the Windows platform.
Downloading NodeJS Installer
To begin integrating NodeJS into Windows environments, the first essential step is to obtain the original NodeJS installer. Navigating directly onto the official NodeJS website will ensure you get the most current and safe program version. The official website is reliable and provides the most recent releases and pertinent details.
Once they have accessed the NodeJS website, visitors will see an easy-to-use interface, which includes a prominently visible “Downloads” section. In this section, a Windows installer is easily accessible. To make it easier to install the process, a step-by-step guide is available, providing easy directions that users can follow. This guide generally involves choosing the most appropriate Windows installer by considering aspects like the system’s architecture (32-bit or 64-bit).
If they carefully follow these steps, users can easily move on to the next step of the installation process, allowing them to begin using the potential NodeJS in the Windows system. This method is meticulous and ensures that users not only get the right installation but also gain an understanding of the specifics of the installation process that will ensure a smoother and more knowledgeable NodeJS installation for your Windows platform.
Installing NodeJS
Installing NodeJS on a Windows system requires a thorough guide designed to make the process easy for people with various technology backgrounds. The installer downloaded via NodeJS’s official NodeJS website opens a user-friendly interface that guides users through the necessary settings. Users are required to select particular settings, like the location of the NodeJS installation and the inclusion of required tools, providing the installation is tailored to their specific needs.
Users can modify certain parameters during installation. However, these default options are appropriate for most situations. Users can also add the NPM (Node Package Manager) to the installation. NPM is a vital component that enables seamless integration of other packages and dependencies into NodeJS projects.
This walkthrough simplifies the installation process and gives users the significance of their decisions. The procedure helps simplify the complexity, making it easier for users to make educated choices regarding utilizing their NodeJS environment best. Ultimately, this process provides the foundation for a solid NodeJS configuration using Windows. Windows platform, ensuring that users are empowered to fully utilize the potential of this runtime for their development projects.
If you have any questions or want to develop a NodeJs application for your specific operating system.

Pooja Upadhyay
Director Of People Operations & Client Relations
Verifying NodeJS Installation
After successfully installing NodeJS onto your Windows system, the next important step is verifying the installation to ensure it works properly. The verification process is easy and involves verifying that NodeJS has been appropriately installed. Users can open the terminal or command prompt and type commands like Node -v to determine the NodeJS version or the npm -v command to check the installed NPM version (Node Package Manager). If these commands show version numbers without errors, it is a sign that the installation is successful.
In addition, the package includes a NodeJS command prompt that gives users a specialized environment to execute NodeJS instructions and scripts. The command prompt is a specialized one that provides an easy-to-use interface designed specifically for NodeJS development, which improves the effectiveness of tasks like the management of packages as well as script execution and debugging.
Two of the most important steps are checking your NodeJS installation and getting familiar with the NodeJS command prompt. These confirm that the development environment is configured and ready for use. This procedure assures that developers can confidently move forward with their NodeJS projects, knowing that the runtime is properly installed and running on the Windows system.
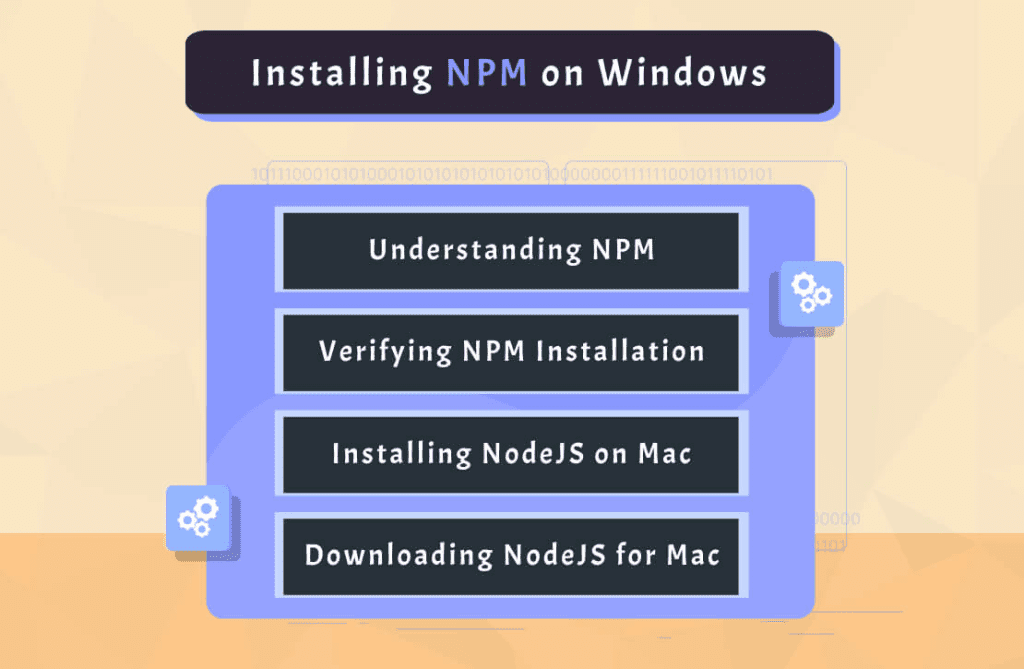
Installing NPM on Windows
The journey to NodeJS development on a Windows system goes far beyond installing NodeJS itself. It is about unlocking the full capabilities of the development platform by including the NPM (Node Package Manager). NPM is a crucial instrument for managing dependencies, facilitating third-party package integration, and increasing the efficiency of Your NodeJS projects.
In this section, we will explore the simple installation procedure with NPM on Windows, giving users the fundamental knowledge required to navigate this essential component of the NodeJS ecosystem. When we look at the steps to install and test NPM, users will be able to understand how to harness this powerful package manager to aid in their JavaScript development projects.
Understanding NPM
Understanding the concept of NPM (Node Package Manager) is essential for any NodeJS developer who wants a more efficient workflow for JavaScript development. NPM functions as a comprehensive package manager, allowing seamless integration of tools, libraries, and other modules into NodeJS projects. Its primary purpose is to make it easier to manage project dependencies and allow developers to concentrate on creating functionality instead of managing complex dependency management.
Beyond its essential function in managing dependency, NPM boasts a vast collection of open-source software and provides a vast ecosystem that developers can explore and use. The vast collection includes various functions, including utility libraries and full-blown frameworks, allowing developers to speed up their work using already-built and tested options.
NPM is also a leader in version management, ensuring that developers can precisely define and manage the versions of dependencies in their projects. This is essential to ensuring continuity and stability across multiple development environments.
Verifying NPM Installation
Checking for the successful installation and operation of NPM (Node Package Manager) on your Windows system is an essential measure to ensure the security of your development environment. This process involves easy steps to verify that NPM is properly installed and operating.
For the first step, developers need to open the terminal or command prompt window and type in an easy command, such as npm—-v. This command displays the NPM version that has been installed and confirms its existence on the computer. A successful output with no errors means that NPM is fully functional.
The testing of basic NPM commands helps further strengthen the process of verification. Developers can execute commands similar to NPM init to initiate a new project and create a package.json File or NPM install to install a particular package. These commands confirm that NPM can complete crucial tasks and communicate seamlessly and efficiently with the NodeJS ecosystem.
If you follow these steps to confirm NPM installation and execute the simple commands, programmers can ensure that your NodeJS developing environment is equipped to manage packages. This verification process sets the foundations for NPM’s ability to work dependencies on projects and access the huge collection of packages to ensure smooth integration in JavaScript projects.
Installing NodeJS on Mac
Installing NodeJS on the Mac system is a step into the realm of flexible and efficient JavaScript development. NodeJS is a server-side running time based on the V8 JavaScript engine, which allows developers to expand their programming skills beyond browsers for the web.
Installing NodeJS on a Mac, a preferred platform for developers, is crucial to taking advantage of the features of this runtime and its package manager companion, NPM. While we go through the complexities of the installation process, users will be able to effortlessly incorporate scripting that runs on servers into their projects, improving their performance and scalability.
Downloading NodeJS for Mac
Installing NodeJS on the Mac system opens the door to unlocking the full potential of strong JavaScript development. The first step in this process is to obtain an official NodeJS installer, which ensures that users can access the most recent and most secure version via the official NodeJS website. On the official website, users will see a prominently displayed exclusive “Downloads” section that provides an easy access point to download an official Mac installer. The official website is an authoritative source that provides the installer with the most important details and updates.
After landing on the Downloads page, users can go through the Mac section and select the correct installer for their particular system. The step-by-step guide with the download process offers precise instructions that ensure the smoothest experience for users with different technical backgrounds. This guide usually requires downloading and installing the software, launching the installation process, and configuring essential settings. Following these instructions, people can easily integrate NodeJS into their Mac environment, allowing for enhanced JavaScript development and the use of the Node Package Manager (NPM) to manage packages effectively.
Installing NodeJS on Mac
Installation of NodeJS on the Mac is an easy but essential process that introduces developers to a robust JavaScript Runtime Environment. The guide to this installation procedure on macOS starts with downloading the latest NodeJS installer via the NodeJS official website. After downloading, the installation process requires an array of simple steps that guide users through the wizard for setting up. In this process, users are presented with configuration options that permit installation modification. The possibilities include
- indicating the destination directory for NodeJS,
- selecting other tools, and setting additional
- settings tailored to your personal preferences.
As the installation progresses, users can see how seamlessly they can integrate NodeJS into the macOS environment. The configuration options are geared towards novice users who prefer standard settings and advanced users who want to modify the setup to meet their particular requirements. The goal is to provide a flexible and flexible installation procedure that can be used for various purposes. If you follow this tutorial and configure the options according to your needs, hire dedicated NodeJS developers to ensure a seamless and optimized installation, laying the foundations for using the points offered by NodeJS development of their macOS projects.
Verifying NodeJS Installation on Mac
Checking that you have installed NodeJS on the Mac is essential to ensure a stable and reliable development environment. Users can use an easy method to ensure the installation is successful. Opening the terminal and running the primary command, like “node-v,” will allow users to verify the version installed of NodeJS quickly. A clear output, with the version number and no mistakes, is a sign of an integrated NodeJS runtime running on MacOS. macOS system.
Furthermore, checking the NodeJS version on the Mac will provide crucial information about the details of the installed runtime. The command ‘node-v’ not only confirms that it is running NodeJS and shows the exact version numbers. This information is essential for developers since it guarantees that they are in line with the version intended, which allows them to take advantage of the features and improvements that come with the particular version.
When they adhere to these steps, Developers can be confident in confirming that they have installed NodeJS in the Mac system. This verification process serves as an essential assurance, setting the conditions for developers to create, test, and install NodeJS applications on macOS with confidence that the development platform is correctly prepared and set for efficient JavaScript development.
Installing NPM on Mac
Installing NPM (Node Package Manager) on the Mac system is important for improving this JavaScript developer environment. NPM is an essential tool that streamlines the management of project dependencies and gives access to a wide range of pre-built software. This article focuses on the simple installation process for installing NPM on a Mac and ensuring developers have the right tools to manage packages within your NodeJS projects. Through the installation process, the users will gain insight into how they can incorporate NPM into their workflows, allowing them to easily integrate other tools, libraries, and modules into JavaScript applications running on MacOS.
Verifying NPM Installation on Mac
Confirming that the application has been installed with NPM (Node Package Manager) long-term support lts on macOS is a simple process to ensure seamless integration in the development environment. To verify your NPM setup, you must use the terminal to execute an easy command like “npm -v.” This command will return the version installed on NPM and allow users to confirm its existence and operational state on their macOS systems. A successful output with no errors means that NPM has been installed correctly.
After confirming an installation’s success, users can play with the basic NPM commands using macOS. The commands include “npm init” to start the project or ‘npm install’ Installing a specific package proves that NPM can complete the necessary tasks. This test phase confirms successful installation and assures that NPM is operational and ready to manage project dependencies.
If they follow these steps carefully, developers can verify the correct functioning and installation of NPM for your macOS system. This verification process gives them the confidence to seamlessly integrate NPM into their workflows, allowing efficient package management and using the extensive collection of JavaScript packages to help their projects.
The Key Takeaway
In conclusion, the installation process of NodeJS and NPM for Windows and Mac systems is essential for anyone who wants to enter the world of JavaScript development. This guide provides users with step-by-step instructions, from downloading the required installers to confirming successful installations. Understanding the importance of NodeJS as a server-side runtime and NPM as a powerful tool for managing packages, programmers can benefit from these tools for their projects.
Whether you’re using Windows or Mac, the procedure has been simplified and provides insight into the system needs, configuration options, and verification steps. With the capability to install and test NodeJS, NPM developers are equipped to embark on smooth and efficient JavaScript development.
Frequently Asked Questions
To install Node.js on a Windows operating system, please adhere to the following steps:
- Begin by downloading the Windows installer from the official Node.js website.
- Proceed to run the installer and carefully follow the instructions provided on the screen.
- After the installation process is complete, you can verify the successful installation by opening a command prompt and entering the command `node -v` to check the installed version of Node.js.
Sure, you can run Node.js on Windows! Node.js has this excellent Windows installer that lets you easily install and run Node.js on your Windows machine.
To install Node.js on a Mac, please follow these steps:
- Begin by downloading the macOS installer from the official Node.js website.
- Proceed to run the installer and carefully adhere to the instructions provided on the screen.
- After the installation is complete, you can verify its success by opening a terminal and typing `node -v` to check the version of Node.js installed.
To install nvm and npm on Windows, follow these steps:
- Download and install nvm (Node Version Manager) from the nvm repository on GitHub: nvm-windows.
- Run the installer and follow the instructions to complete the installation.
- Open a new command prompt window and type nvm install <version> to install the desired Node.js version. For example, nvm install 14.17.0.
Once the installation is complete, you can switch between different Node.js versions using the nvm use <version> command.
To install Node.js on Mac M2, follow these steps:
- Download the latest version of Node.js from the Node.js website: Node.js.
- Open the downloaded .pkg file and follow the installation instructions.
- Once the installation is complete, open a terminal window and verify the installation by typing node -v and npm -v to check the Node.js and npm versions, respectively.
To install node.js and npm (Node Package Manager), follow these steps:
1. Download Node.js:
- Go to the official Node.js website (https://nodejs.org).
- Click on the “Downloads” button.
- Choose the version that matches your operating system (Windows, macOS, or Linux).
- Download the installer and run it.
2. Install Node.js:
- Follow the installation instructions provided by the installer.
- Accept the license agreement.
- Choose the destination folder for installation (you can leave the default settings).
- Click “Install” to begin the installation process.
3. Verify Installation:
- Open a terminal (Command Prompt on Windows, Terminal on macOS and Linux).
- Type `node -v` and press Enter. This command will display the installed Node.js version.
- Type `npm -v` and press Enter. This command will display the installed npm version.
4. Updating npm (optional):
- To update npm to the latest version, use the following command:
npm install npm@latest -g
This command will update npm to the newest version globally.
5. Using Node.js and npm:
- You can now start using Node.js and npm to develop and manage your Node.js applications.

Pooja Upadhyay
Director Of People Operations & Client Relations